Apple Mac SSD upgrade
Upgrading your Apple Mac old hard drive for a more modern Solid State Drive (SSD) is surprisingly affordable, and can typically improve performance 5 fold.
The install process itself is relatively easy and will cost you less then £50, even if you don’t know all that much about the insides of computers.
Do you need to upgrade your Mac hard drive?
Fitting a blisteringly fast SSD into your Mac or MackBook is a quick and really easy way to boost performance but an upgrade might not always be needed, however if you are experiencing any items below than an SSD upgrade is the way forward.
Upgrading your Mac to and SSD will dramatically improve the following:
- Slow start-up times
- Poor performance all around, and particularly in resource-hungry applications such as Photoshop
- System crashes and/or spinning rainbow wheel from hell
What to consider when choosing a new SSD
I want:
- More storage space
- Better performance
- All of the above
Is my Mac compatible with an SSD upgrade?
It is no surprise that Apple have made this complicated, but here at Jeypop we like to keep it simple:
The first thing you need to do is find out if the existing internal disk drive is soldered onto the mother board. If it is – then it is likely that you already have an SSD installed.
If you are looking to upgrade to an SSD because you have an older model that is either running out of space, running really slowly, or you don’t actually know if you have an SSD already or not – then the easiest way to find out is to run the Crucial System Scanner.
Of course there are lists online that tell you if your Mac Model can be upgraded, but that allows for human error or misunderstanding. With the Crucial System Scanner – you will know without any doubt if you can upgrade or not.
The scanner is a free tool, that doesn’t install – it just runs once and tells you if your Mac has any upgrades available. Now of course the Crucial System Scanner is going to tell you about Crucial upgrades, but don’t worry – we wont be buying from Crucial; we are just going to use their tool to tell us if we can upgrade or not.
The Crucial System Scanner
Head over to: head over to http://uk.crucial.com/gbr/en/systemscanner
Put a check in the “I agree…” box and select “Scan Computer”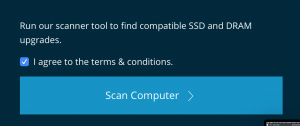
The scanner will download, and you will be asked if you want to trust this download. The answer is yes – it is perfectly safe.
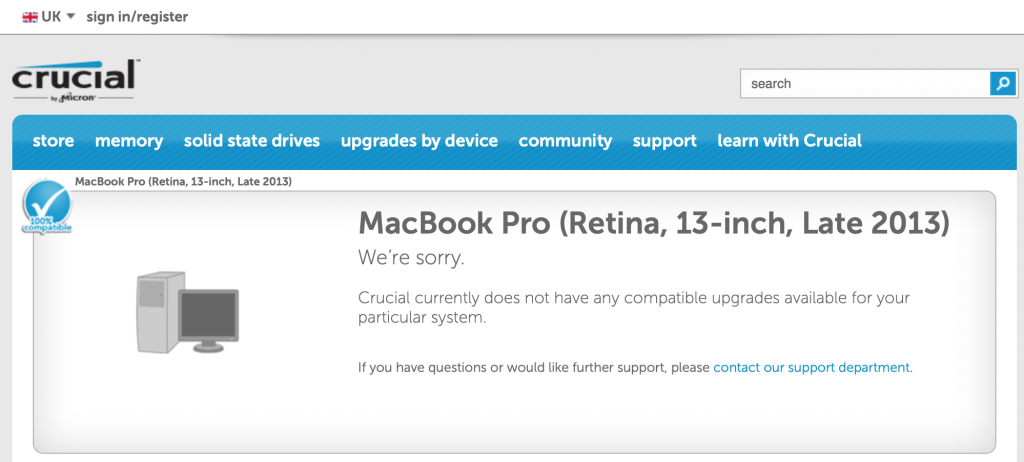
After a few seconds, you will be presented with a result page, it will either let you know that there are upgrades available for you, or that there aren’t.
If like me, there aren’t any upgrade available – it means that both the internal storage and memory are soldered in, and that I already have an SSD.
I will follow this article up with ways to improve performance on a Mac that already has an SSD at a later date.
If the Crucial System Scanner returns no upgrade options, then there is no point continuing with this article, however please come back soon to find my guide on how to improve performance on Macs that aren’t upgradable.
So you have upgrade options – what’s next?
Unlike a standard x86 (Desktop PC or Laptop) you can’t just buy any old SSD drive and install it. While you should be able to – I and so many others have been caught out with some of the lower priced SSD drives that are available that just don’t work in a Mac. Technically – they all should be supported, but in reality they just aren’t.
The brands that I have used and know work with an Apple Mac are Crucial, Kingston, and Samsung. I would imagine that SanDisk, Western Digital, etc would also work, but I have had issues with Liteon and Gigabyte SSD drives not working with Macs.
For the sake of this article, I’m going to recommend you go with the Kingston A400 – I know it works well with Macs, it is exceptionally fast and Kingston are the cheapest (at the time of writing this article).
Which size do I need?
If the whole point of upgrading your drive is because you ran out of storage space, then chances are you are going to need a 240 Kingston A400 SSD Drive or the larger 480GB Kingston A400 SSD Drive. Despite only wanting to upgrade for more space, you will still see a marked performance increase.
If however storage space isn’t currently an issue, and you just want to significantly upgrade the performance of your Mac then a 120GB Kingston A400 SSD Drive should do the trick.
How to fit the new MacBook Pro SSD
Below is a list of things you are going to need:
Step 1: Prepare the new Mac SSD Upgrade
For the sake of this article, I am going to assume that you want to keep your Mac data and setup exactly as it is, rather than start again from a blank canvas.
For those of you that do want to start from a blank canvas – check back to see my article about installing OSX from scratch in a week or so.
To perform a MacBook SSD upgrade you are going to need to prepare your new SSD to accept data.
- Use the SATA-to-USB cable to connect your new SSD to a free USB port on your Mac
- Press CMD + Space Bar to open spotlight search and type Disk Utility. (press Enter)
- Click on the disk listed under External, then the erase button.
- Give your new SSD a name “Macintosh SSD”, select “Mac OS Extended (Journaled) “from the Format drop down menu, and check the Scheme is set to “GUID Partition Map”
- Press Erase.
Depending on the version of OSX you are currently running, the actual process might be slightly different. Which ever version you are running you should match the following when setting up the new drive:
Format: Mac OS Extended (Journaled)
Scheme: GUID Partition Map
Once the erase procedure has completed, Time Machine might pop up and ask if you want to use this new SSD for backups. Just close time machine – “ain’t nobody got time for that!”
Now my new SSD is prepared, what’s next?
You have two options here, if you have one of the later versions of OSX installed then you should be able to press the Restore icon.
- Disk-to-Disk Restore
- Make sure your new SSD is selected and hit the restore button
- A new window will pop up asking “Would you like to restore…”
- Make sure the “restore from:” source is set as your current hard disk and press the “restore” button.
- Wait for the your existing disk to be cloned to the new one, and then shut down the Mac.
2. System Restore
If you are running an older or earlier version of OSX then the restore icon might not be available to you, or for some reason the restore attempt failed.
- Shutdown you Mac and restart it, holding down the Option key.
When prompted, use the keyboard to move over to the Recovery disk and press enter. - Once the Mac has booted into Recovery mode, click on Reinstall Mac OSX and choose the new SSD as the install destination.
- As part of the setup process you will be asked if you want to restore files from another disk. Choose the existing hard drive.
- Once completed shutdown your Mac.
Step 2: Remove the existing hard drive and install the new SSD.
- Be sure to check that your Mac is shut down.
- Flip your Mac over and remove the screws from the rear, being careful not to drop any.
- Remove the cover and put in a safe place.
- Find the hard drive and remove the small plastic bracket holding it in place with 2 screws.
- Slowly lift the hard drive and disconnect the SATA ribbon cable. Take care not to damage the cable. A gentle wiggling of the connector should do the trick.
- Remove the screws from the hard drive and screw into the new SSD.
- Gently attach the SATA ribbon cable to the new SSD and lower into place.
- Put the holding bracket back and screw into place.
- Carefully take the cover previously removed and reinstate, being sure to screw back securely.
Step 3: Booting the Mac from the new SSD
- Switch on your Mac and allow to boot into OSX.
- Press CMD + Space Bar and start to type in Start Up Disk and press Enter.
- Select the new SSD and press Restart.
Step 3b: If your Mac will not start
- Switch on your Mac holding the Option key
- When prompted select your newly installed SSD and press Enter
- Once the system has booted, follow Step 3
That’s it all done 🙂
Enjoy your much faster Mac
Your new SSD will make a noticeable impact. Applications will launch faster and your overall experience will be a lot smoother.